Sound Show includes a Scheduler tool that lets you start a sound at a precise clock time.
In this tutorial, you’ll learn how to open the Scheduler panel, schedule a sound, configure repeat options, change playback behavior, and even save your scheduler setup into a reusable button.
Video version:
1 - Open the Scheduler Panel
First, make sure the Scheduler panel is visible.
If you don’t see it:
- Open the top menu View
- Click Scheduler
Once enabled, the Scheduler panel appears in the interface.
You can dock it wherever you want (for example, at the bottom of the interface), depending on your layout. Move it by dragging the header.
2 - Add a Sound to the Scheduler
To schedule a sound, you’ll need to add it to the Scheduler list.
- Enter Edit Mode (Tips: you can use Quick Edit Mode by holding Left Ctrl)
- Drag and drop a sound into the Scheduler panel
Once dropped, Sound Show automatically creates a scheduled item.
Note: You can schedule any item: video, image, instructions...
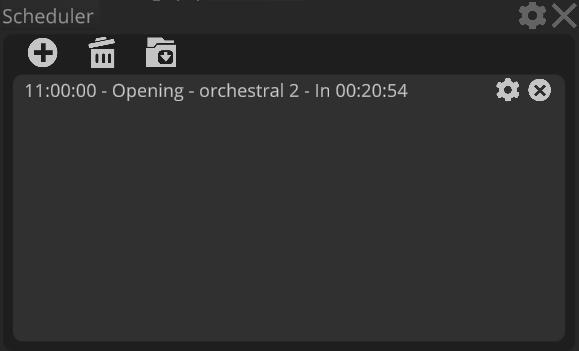
3 - Configure the scheduled item
Set the Play Time
By default, when dropped a new scheduled sound is configured to start in 10 minutes.
To change it:
- Click the configuration button of the item
- Locate the Play Time field
- Set it to the exact time you want
Repeat the Sound Automatically (Optional)
To enable repeating:
- Find the Repeat Every setting
- Enter a value (example: 10 seconds)
Once enabled, Sound Show will automatically replay the sound at the chosen interval.
This is great for:
- recurring ambience loops
- timed alerts
- repeated reminders
- pacing cues for live events
Choose action
You can also change the Action of the scheduled item.
For example, in the video, the action is set to Crossfade to replace all the sounds playing at that time
Disable / Re-enable a Scheduled Sound
Each scheduled item can be toggled on or off.
- Disable it if you don’t want it to run
- Re-enable it instantly when needed
This lets you keep scheduled entries prepared without deleting them.
Schedule Multiple Sounds
You’re not limited to one item.
You can add multiple sounds to the Scheduler panel and manage them all independently, each with their own:
- play time
- repeat interval
- action type
- enabled/disabled state
4 - Save Your Scheduler Setup Into a Button
You can save the current Scheduler list into a button, so you can restore it later.
To do it, click the save button in the Scheduler panel and select where you want it to be saved (category, position...)
Clicking the saved button reloads all scheduler items exactly as they were
Conclusion
That’s it, you now know how to play sounds at a specific time in Sound Show using the Scheduler.